
How to Floss Your Teeth West Caldwell, NJ
Children should start flossing as soon as two teeth touch, typically around age two or three. From that point until roughly age eight to ten, most children need a parent to floss for them. Flossing removes plaque and debris from between teeth and just below the gumline, areas where a toothbrush cannot reach and where the majority of childhood cavities form. According to the CDC's Oral Health Tips for Children, cleaning between teeth daily is a critical part of a child's oral hygiene routine alongside brushing with fluoride toothpaste.
At Little Molars Pediatric Dentistry in West Caldwell, Dr. Chirag Patel provides personalized flossing guidance at every preventative care visit, adapted to your child's age and development. Dr. Patel is a board-certified pediatric dentist who completed his specialty training at St. Joseph's Regional Medical Center in Paterson, NJ, and holds a fellowship in Dental Medicine for the Developmentally Disabled from Stony Brook School of Dental Medicine. He is a member of the American Academy of Pediatric Dentistry (AAPD) and the American Board of Pediatric Dentistry. Our full range of pediatric dental services is built around preventing problems before they start.
Why Flossing Matters and What It Prevents
Plaque is a sticky bacterial film that forms on teeth throughout the day. The bacteria inside it produce acid whenever a child eats or drinks, and that acid attacks tooth enamel. Left undisturbed in the tight spaces between teeth, plaque hardens into tartar, which only a professional cleaning can remove. A toothbrush cleans the surfaces it can physically reach but cannot get between closely touching teeth or beneath the gumline. Those are exactly where cavities most commonly form in children, and flossing is the only home hygiene tool that clears them.
Regular flossing prevents interproximal cavities, the kind that form between teeth and are often invisible until decay has progressed significantly. Our digital X-rays at routine checkups catch these hidden cavities, but preventing them through daily flossing is always the better outcome. Flossing also reduces the risk of gingivitis, the early stage of gum disease, and prevents the tartar buildup that extends professional cleaning time. For children already receiving dental sealants and fluoride varnish, daily flossing is the home habit that keeps the protected surfaces clean between appointments.
“Flossing is the only home hygiene tool that clears plaque from between teeth and just below the gumline, the areas where childhood cavities form most.”
How to Floss a Toddler's Teeth
Most toddlers and young children do not have the manual dexterity to floss on their own. Parents should floss for them from the moment any two teeth touch, which usually happens between age two and three. Children can typically start flossing independently somewhere between ages eight and ten, once their fine motor skills are developed enough to control the floss without help.
What to Use for Young Children
Pre-threaded floss picks and Y-shaped floss holders are the easiest tools for parents flossing a toddler's teeth. They require one hand rather than two and give better visibility and control than managing a long strand of string floss in a small mouth. Traditional string floss works equally well once the technique becomes comfortable for the parent, but picks are a good starting point.
Technique for Toddler Teeth
Stand behind your child with their head resting back slightly, either on your lap or against your body, which gives you a clear view of all teeth. Work one contact area at a time. Guide the floss or pick between two teeth using light pressure, bend it into a C-shape against the side of each tooth, and slide it gently just below the gumline. Use a fresh section of floss or flip to the clean side of the pick before moving to the next space. The whole process takes under a minute once it becomes routine, and building it into a consistent nightly habit from an early age makes the transition to independent flossing easier later on.
“Pre-threaded floss picks give parents better visibility and control in a toddler's small mouth than managing a long strand of string floss.”
How to Floss: Two Methods for Kids
Once children are old enough to floss with guidance, two techniques work well depending on the child's hand size and coordination level. Both remove plaque effectively when used correctly. Water irrigators and floss picks are useful tools but do not remove plaque from between teeth the way dental floss does. Only floss delivers the physical scraping action that dislodges the plaque film.
The Loop Method (often easier for younger children who are just starting independently):
- Cut approximately 18 inches of floss and tie it firmly into a loop.
- Place all fingers inside the loop with thumbs outside.
- Use thumbs to guide the floss between each set of touching teeth.
- Bend the floss into a C-shape against the side of each tooth and slide it gently just below the gumline.
- Rotate the loop to a fresh section before moving to the next tooth space.
The Spool Method (more common for older children and adults):
- Cut 18 to 20 inches of floss and wrap each end several times around the middle fingers of each hand.
- Use index fingers and thumbs to guide the floss between teeth.
- Bend the floss into a C-shape, sliding it up and down the side of each tooth and just beneath the gumline.
- Advance to a fresh section of floss for each tooth space.
The key motion for both methods is the C-shape that hugs the tooth surface rather than snapping the floss straight down, which can irritate the gum tissue. Dr. Patel demonstrates correct technique at any routine preventative care visit for parents who want to see it in person.
“The C-shape motion hugs the tooth surface and slides below the gumline. Snapping floss straight down irritates gum tissue without cleaning as effectively.”
Check out what others are saying about our dental services on Yelp: How to Floss Your Teeth in West Caldwell, NJ
How to Floss Molars
Back molars are the hardest teeth to floss. They sit further back in the mouth, have tighter contact areas between them, and are harder for children to keep open long enough for a parent to reach them comfortably. They are also the teeth most prone to decay. The deep grooves on the chewing surfaces of molars are protected by sealants, but the contact areas between molars are where interproximal cavities form, and only flossing reaches them.
Flossing Between Back Molars
The technique for flossing molars is the same as for front teeth, but the angle and approach matter more. Use a 18-inch strand of floss, wrap the ends around middle fingers, and use index fingers and thumbs to guide the floss. For back molars, index fingers do most of the work rather than thumbs. Place one index finger inside the mouth toward the cheek and one outside, guiding the floss into the contact area between molars. Angle the floss slightly toward the back of the mouth to navigate the curved shape of the molar surface, then use the C-shape motion against each tooth and slide just beneath the gumline on both sides of the contact area before pulling out.
When Children Resist Back Molar Flossing
Children often gag or resist when a parent tries to reach the back molars. A Y-shaped floss pick reaches the back molars more easily than traditional string floss because the handle keeps fingers further from the throat, reducing gag reflex. The floss pick's shorter reach also makes it easier to angle correctly between molars. For children who consistently resist, building the habit gradually (starting with front teeth and working backward over several weeks) is more effective than attempting all teeth at once from the start.
If your child has cavities consistently forming between molars despite regular flossing, it may be worth discussing whether the technique is reaching the gumline correctly. Dr. Patel can assess the contact areas at a routine visit and recommend adjustments. Our preventative care program is built around giving each child exactly that kind of individual guidance. If decay does develop between molars, our cavity treatment page covers the options.
“Back molars are the hardest teeth to floss and the most prone to decay. A Y-shaped floss pick reaches them more easily and reduces gag reflex.”
Flossing With Braces and Choosing the Right Floss
Braces make flossing more important and more difficult at the same time. The archwire connecting each bracket blocks the normal path of the floss, so it cannot be threaded straight down from above the way it normally would be. Plaque accumulates around brackets and wires in ways that accelerate decay, making thorough flossing during orthodontic treatment critical.
A floss threader is a thin, flexible plastic tool with a stiff pointed end that threads floss underneath the archwire. Run the pointed end under the archwire, pull the threader through until several inches of floss pass the wire, then floss the two teeth bordering each space with the C-shape technique. Repeat for each gap between teeth. Orthodontic floss picks with a wider bridge that fits over archwires are also available and eliminate the threading step, which can make the process faster for older children managing it on their own.
Which Type of Floss Works Best for Children
Waxed floss slides more easily between tightly spaced teeth and is less likely to shred or snap, making it a practical starting point for most children. Unwaxed floss produces a faint squeaking sound when it passes over a truly clean tooth surface, which can help children learn to recognize when each tooth is actually clean. Pre-threaded picks work well for children just learning to floss independently, easier to control than string floss in a small mouth, and significantly better than not flossing. Water irrigators flush debris from around braces and hardware but do not remove plaque from between teeth. They supplement regular flossing but do not replace it.
“The best floss for your child is the one they will actually use consistently. Waxed floss, picks, or threaders all work when the technique is correct.”
Questions Answered on This Page
Q. Why does flossing matter and what does it prevent?
Q. How do I floss my toddler's teeth?
Q. What are the two main flossing methods for kids?
Q. How do you floss back molars?
Q. How do you floss with braces and which floss is best?
People Also Ask
Q. What does preventative pediatric dental care cover?
Frequently Asked Questions
Q. When should children start flossing?
A. Children should begin flossing as soon as two teeth touch each other, typically around age two or three. At that age most children do not have the coordination to floss independently, so parents should do it for them. Most children can begin flossing on their own somewhere between ages eight and ten, once they have developed the manual dexterity to control the floss correctly.
Q. How do I floss my toddler's teeth?
A. Pre-threaded floss picks or Y-shaped holders work best for toddlers. Stand behind your child with their head tilted back slightly, which gives you a clear view. Guide the floss or pick between each set of touching teeth, bend it into a C-shape against each tooth surface, and slide it gently just below the gumline. Keep the experience calm and brief. Doing it consistently at the same time each night builds the habit more effectively than doing it thoroughly once a week.
Q. How do you floss back molars?
A. Use your index fingers rather than thumbs to guide the floss between back molars. Place one index finger against the inside cheek surface and one on the outside to control the floss as it enters the contact area. Angle the floss slightly toward the back of the mouth to follow the curve of the molar, then use the C-shape motion against each tooth surface and slide just beneath the gumline on both sides before pulling out. A Y-shaped floss pick reaches back molars more easily than string floss and reduces gag reflex by keeping fingers further back from the throat.
Q. Why is it harder to floss back teeth and what helps?
A. Back molars are harder to floss because they sit further from the front of the mouth, have tighter contact areas, and are more difficult to keep visible while working. Children also tend to resist because reaching back teeth triggers the gag reflex. Y-shaped floss picks and floss holders help by improving the angle of approach. Building the habit gradually, starting with front teeth and adding molars over time, reduces resistance more reliably than attempting all teeth from the start.
Q. What is a floss threader and when does my child need one?
A. A floss threader is a thin plastic tool with a stiff pointed tip that threads floss underneath a dental archwire when a child has braces. Without one, the archwire blocks the floss from reaching between teeth normally. To use it, push the pointed end under the archwire from the front, pull the threader through until several inches of floss clear the wire, then floss the adjacent teeth with a C-shape technique. Orthodontic floss picks that fit over archwires are also available and eliminate the threading step.
Q. Can a water flosser replace regular floss for kids?
A. No. Water flossers are effective at rinsing debris from around braces, bridges, and hardware, but they do not remove plaque from between teeth the way dental floss does. Plaque is a sticky film that requires the physical contact of floss to dislodge. Water flossers can be used alongside regular flossing but are not a substitute for it. At Little Molars Pediatric Dentistry in West Caldwell, Dr. Patel can recommend specific tools based on your child's age, spacing, and oral hygiene habits at any routine visit.
Quality Pediatric Dental Services Can Transform Smiles
By visiting us as soon as possible, our team can help get your child the professional treatment they need.

Scan here to view this page, How to Floss Your Teeth, on mobile
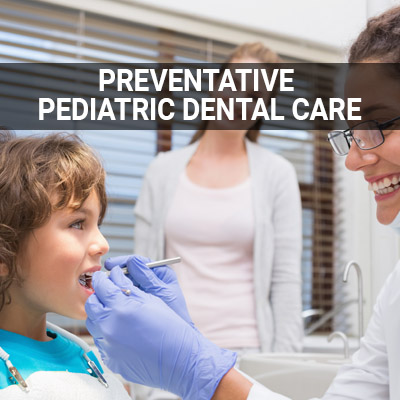

Flossing Guidance at Little Molars Pediatric Dentistry
Good flossing habits, built early, are one of the most effective investments in a child's long-term oral health. Little Molars Pediatric Dentistry provides personalized flossing technique guidance at every preventative care visit, adapted to your child's age, tooth spacing, and home routine. We serve families throughout West Caldwell, Montclair, Essex Fells, Cedar Grove, and the surrounding communities of Essex County. Dr. Patel's board certification, fellowship training, and faculty role at Zufall Health Center in West Orange mean every recommendation reflects current clinical evidence. Learn more about our approach on our about page.
If your child is overdue for a checkup or you have questions about flossing technique, contact our office today to schedule an appointment at our West Caldwell practice.
Helpful Related Links
- Centers for Disease Control and Prevention (CDC). Oral Health Tips for Children. 2024
About our business, license, and website security
- Little Molars Pediatric Dentistry was established in 2023.
- We accept the following payment methods: Cash, Discover, MasterCard, and Visa
- We serve patients from the following counties: Essex County
- We serve patients from the following cities: West Caldwell, Caldwell, North Caldwell, Fairfield, East Hanover, Montville, Verona, and Montclaire
- Norton Safe Web. View Details
- Trend Micro Site Safety Center. View Details

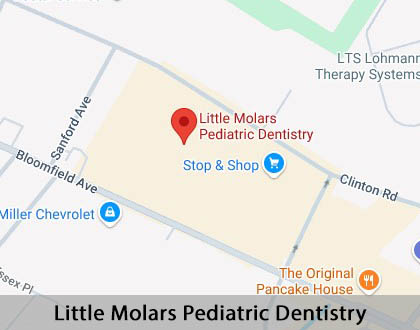
Scan here to open directions to Little Molars Pediatric Dentistry on mobile
Back to top of How to Floss Your Teeth
Related Posts

What Are The Signs My Baby Is Teething?
Your baby has been fussier than usual, drooling through their bibs, and gnawing on anything within reach. If this sounds familiar, teething is likely underway. It is one of the earliest developmental milestones parents face, and it can feel overwhelming when you are not sure what is normal and what is cause for concern. Fortunately,…

Baby Bottle Tooth Decay: Prevention Tips Every Parent Should Know
Baby bottle tooth decay is one of the most common dental concerns affecting infants and toddlers, yet it is also one of the most preventable. It develops when a child's teeth are frequently exposed to sugary liquids, such as milk, formula, or fruit juice, for extended periods. When these liquids pool around teeth during sleep…

Does My Child Really Need Dental Sealants?
If your child’s dentist has recommended dental sealants, you might wonder whether this preventive treatment is truly necessary or just an optional extra. Many parents feel uncertain about the benefits of sealants, especially when their child seems to have healthy teeth with no visible problems. Some worry about the cost, safety concerns they’ve heard about,…
Explore additional topics covered on our website:
Call Us Today

Scan here to call Little Molars Pediatric Dentistry on mobile